
For Maureen!!
I haven’t time to do a video but I decided to publish this now and not wait…
more tips for painting with ink.


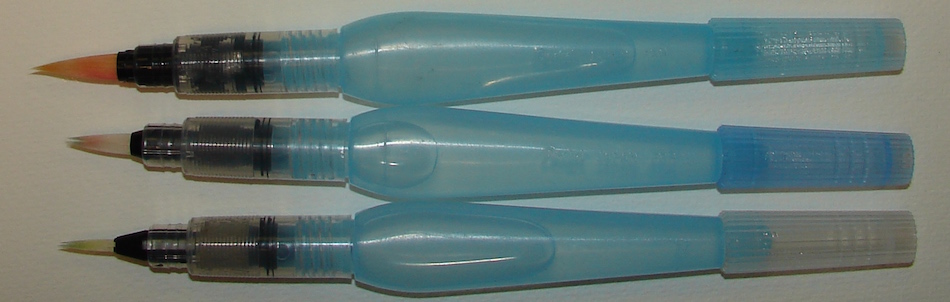
Above, I simple use a Pentel Aquash waterbrush filled with water,
and touched the Robert Oster Emerald ink on the top or undersides of
my TWSBI Eco 1.1, then ran it along the DRY paper edge (#1) and
then pulled it down without squeezing and it naturally dilutes with water.
Then before it was completely dry, I went back in with much more ink on my brush
and created the reflection of the trees in the lake.
After that was dry, I sketched the trees…
Note that the ink will go through watercolor paper much faster than watercolors,
so I sketched several layers keep it from going through.
Finally, I touched my waterbrush with a bit more ink on the tips
and filled in select areas of the front trees.
This took about 15 minutes without drying times, and woudl be a good practice.
A very very fast little sketch, used by me to test inks.


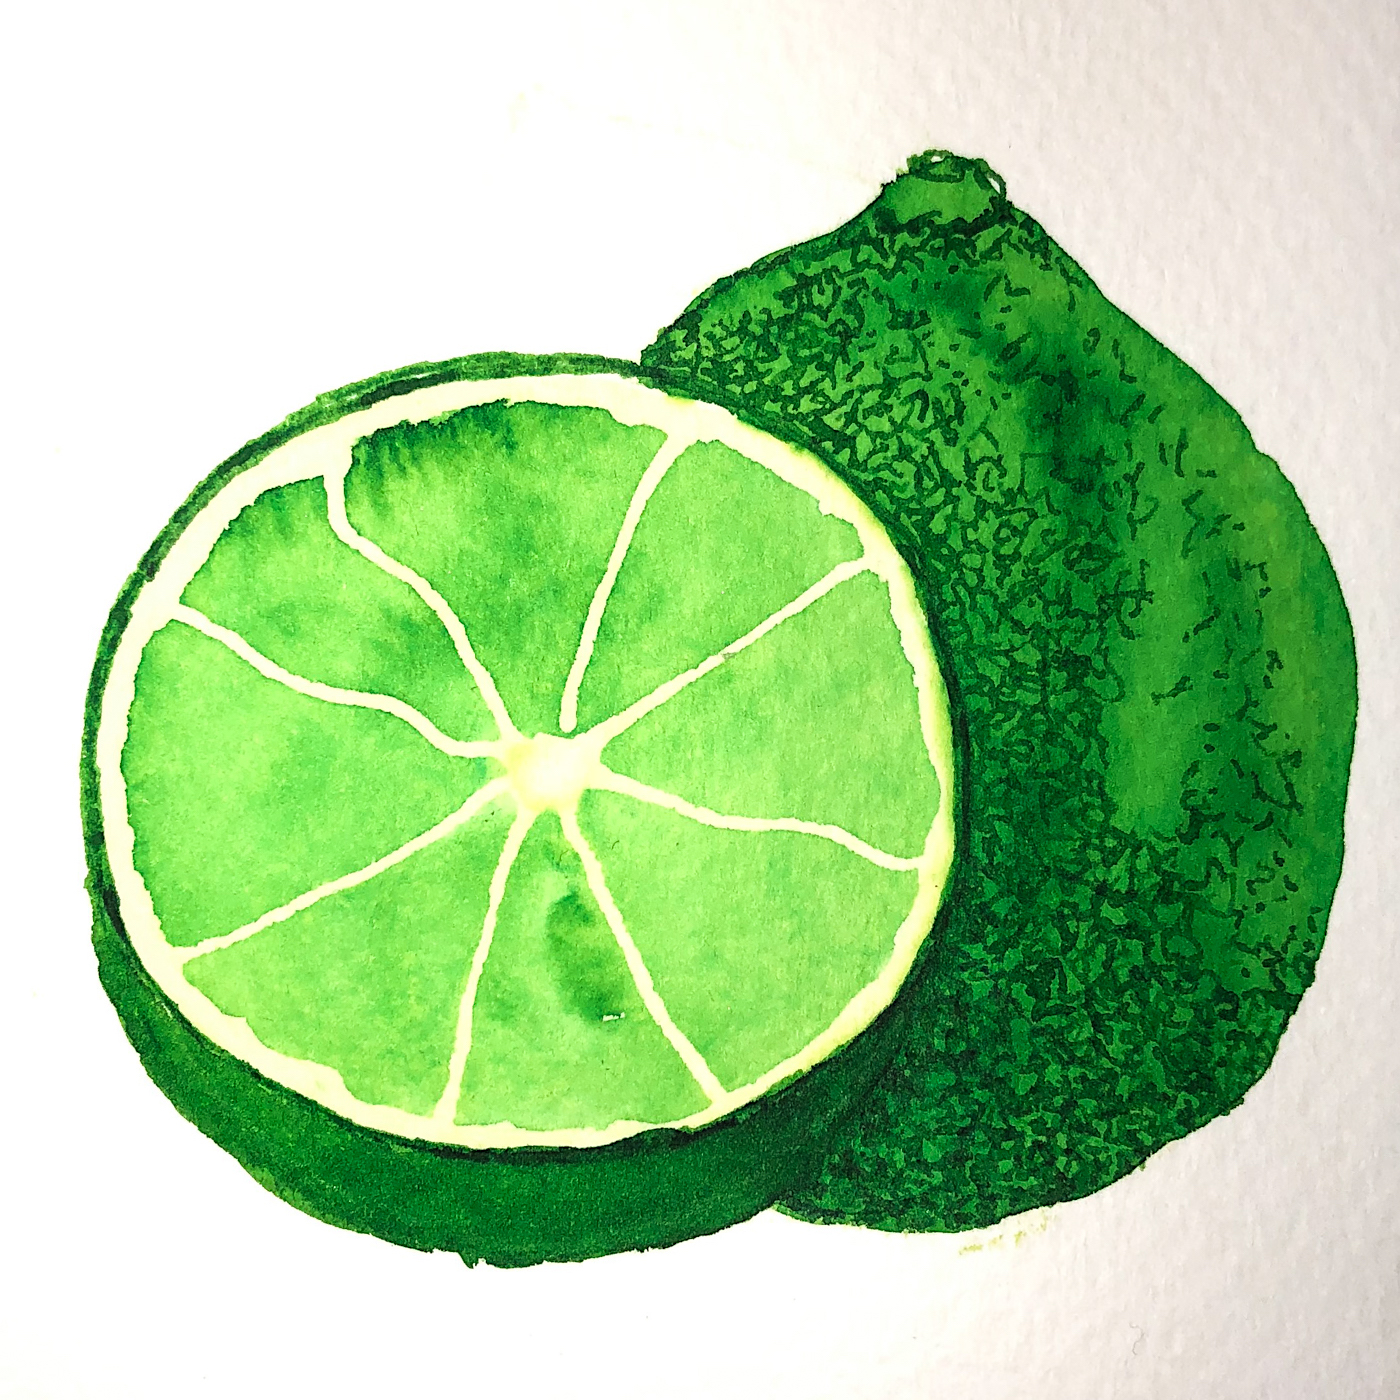
This is a totally different protocol. The paper was wet for the diluted lighter wash.
WET, as in, wet it once then came back and wet it again just before I started.
I touched the Pentel Aquash waterbrush to my Platignum pen to pick up Robert Oster Green Lime ink, and created the lightest value of the green.
I let that dry, then added the darkest “wash” on dry paper (#1).
Just like with watercolors, I play around and get to know the inks I am painting with… Are they waterproof? resistant? fully soluble?
It is important because you want to know what flexibility you have!
In this case, Green Lime ink is extremely soluble… This means that I can fully erase a line, which becomes important a bit later as I changed my sketch.
In #2 I added Fineline Masking Fluid to save the pale areas of the cut lime.
Let it thoroughly dry! I was happy happy when I found out
it works just as well (so far) for inks as it does for watercolors!
#3 shows the third value of the same ink, and now this takes a bit of practice to get just the right amount of ink (very little) on your brush and move it so that you have the right color all around the drawing. Soluble ink works best for this.
After drying I removed the masking fluid…
 I needed to change the
shape of the cut lime
(I’d started with one idea then changed it) and this is where soluble inks rule… #4-#5 I was able to go over the old ink,
add to the line of my
new dark Green Lime ink.
Big tip: If you decide to move inks, go over the entire area instead of touching up, or it will bloom (see deliberate bloom right) instead of blending. Inks are very different than watercolors!
I let that area dry.
I then came back and added line details using my pen in #6.
If you want your ink lines a bit soft let the paper be just damp —
If sharp, then dry. I wanted these sharp.
This sketch took longer, needed planning, needs a bit more practice.
About a half hour not including drying time.
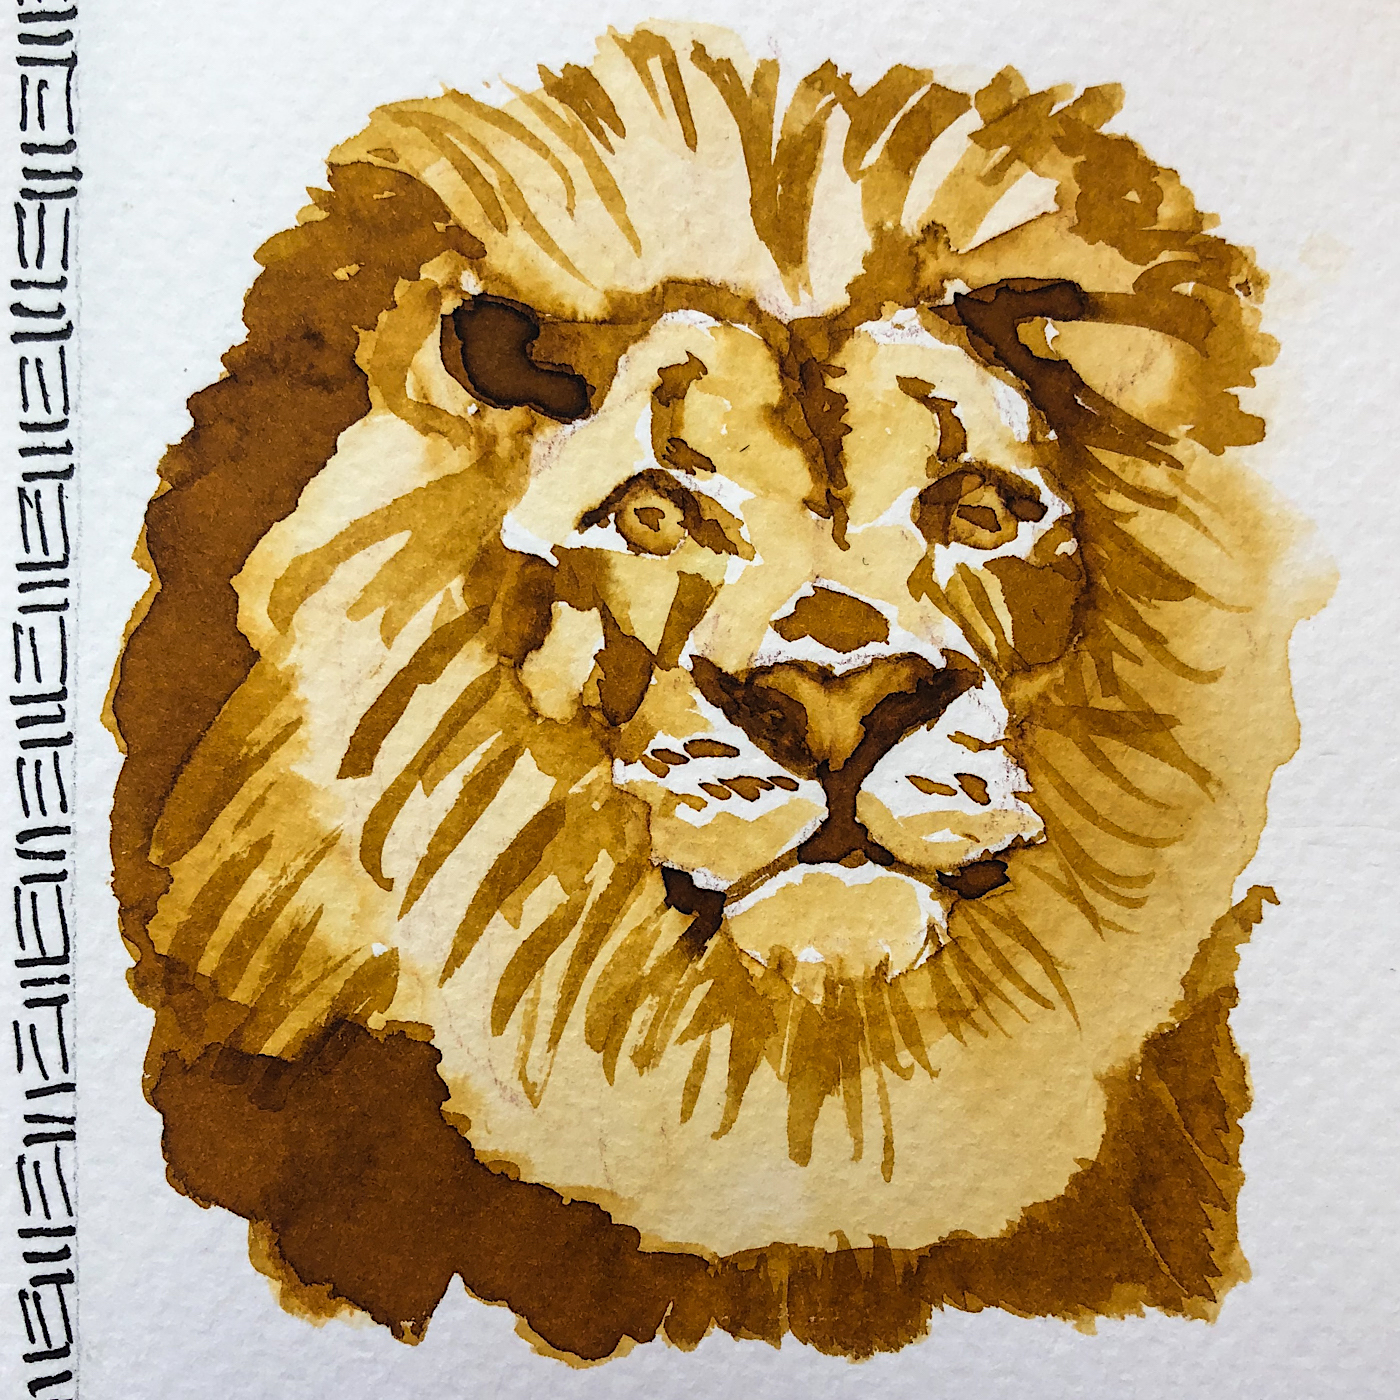
This was a buildup of several layers of inks over a drawing with watercolor pencil.
I started with the lightest on wet paper, let dry, then began adding layers while squeezing the waterbrush. Practice — the amount of squeeze (adding water) and the amount of ink you pick up off the tip of your pen determines the value of the ink.
Lamy Vista with Robert Oster African Gold ink and a Pentel Aquash waterbrush.

I have a lot more info on inks here!
I am back to building and adding
to these pages regularly again…
I love Pentel Aquash waterbrushes, and buy them in the packs from Amazon.
They keep their points longer than others I’ve tried,
and the plastic screw mechanism doesn’t disintegrate quickly.
I use them for diluted ink washes, but LOVE that I don’t have to have an
open container of water in bed with me at night!
BTW, inks are harder to tame than watercolors!


 To hear about classes, follow me on Facebook
or check out my new, improved dkatiepowellart.com
“Memory is more indelible than ink.”
Anita Loos, Gentlemen Prefer Blondes.
“I think not….”
Me… why I journal!
Hahnemühle Nostalgie Sketchbook,
Fineline Masking Fluid, Pentel Aquash waterbrush,
,TWSBI Eco 1.1 with Robert Oster Emerald ink,
Platignum pen with Robert Oster Green Lime ink,
Lamy Vista with Robert Oster African Gold ink.
No watercolor.


©D. Katie Powell.
My images/blog posts may be reposted; please link back to dkatiepowellart.
☾
 As my Patreon supporter, you will have
access to some content not on this website,
sneak previews, goodies, discounts on classes.
I teach architectural sketching,
art journaling (art+writing), creativity, watercolors.
That annoying loud-mouth editor/critic in your head? GONE! How great would that be?


That lime looks so good, I want a giant bottle of Corona 😉
LikeLike
Me too…
LikeLiked by 1 person
That Emerald ink is beautiful!
LikeLike
Yesh!
LikeLike