This page is devoted to painting tips I have published
and all will be put right here until I can do a video!
I am fine with you using my images and trying your hand at copying them:
If you publish your efforts please give credit back to me
by suggesting they also visit these pages.
INK FOR PAINTING
Ink for painting has different requirements than writing.
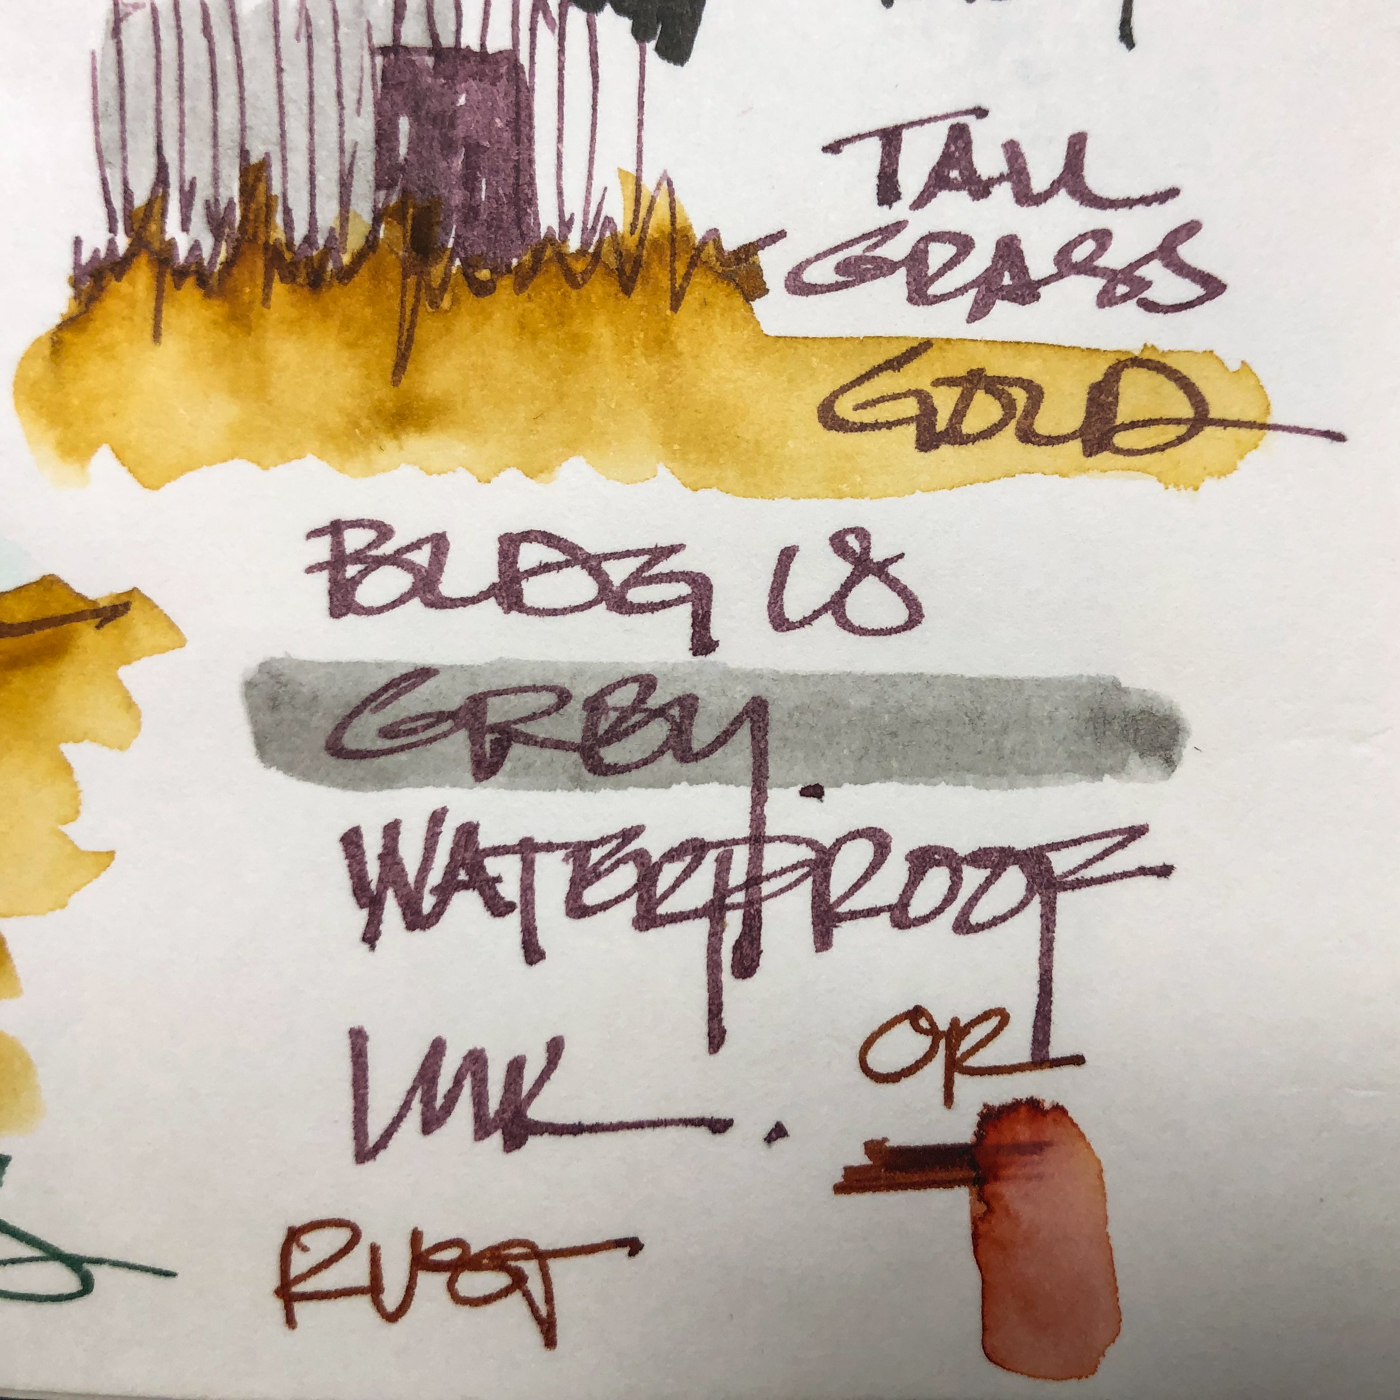
One is not better than another, but like any medium, is is good to know what you are playing with! Is it waterPROOF, water RESISTANT, or Water SOLUBLE?


WATERPROOF! You have to know if your ink is waterproof (good for linework and brushing watercolors over, above) or for grisaille (second image, above).
“Grisaille (/ɡrᵻˈzaɪ/ or /ɡrᵻˈzeɪl/; French: gris [ɡʁizaj] ‘grey’) is a term for a painting executed entirely in shades of grey or of another neutral greyish colour… A grisaille may be executed for its own sake, [or] as underpainting … working in grisaille was often chosen as being quicker and cheaper, although the effect was sometimes deliberately chosen for aesthetic reasons. Grisaille paintings resemble the drawings, normally in monochrome, that artists from the Renaissance on were trained to produce.” WIKIPEDIA
There is also brunaille (brown tones) and verdaille (green tones).
For an older posting on waterproof inks, go here.
SO many inks that writers say are waterproof are water resistant…
As an artist that means you will get movement in your ink when it is least wanted.
WATER RESISTANCE: If an ink has some water resistance,
I can use that to build up layers… (more)
WATER SOLUBLE: Inks that move when hit with water…
Most of the inks I am writing about here are water soluble.
Lovely for ink painting!


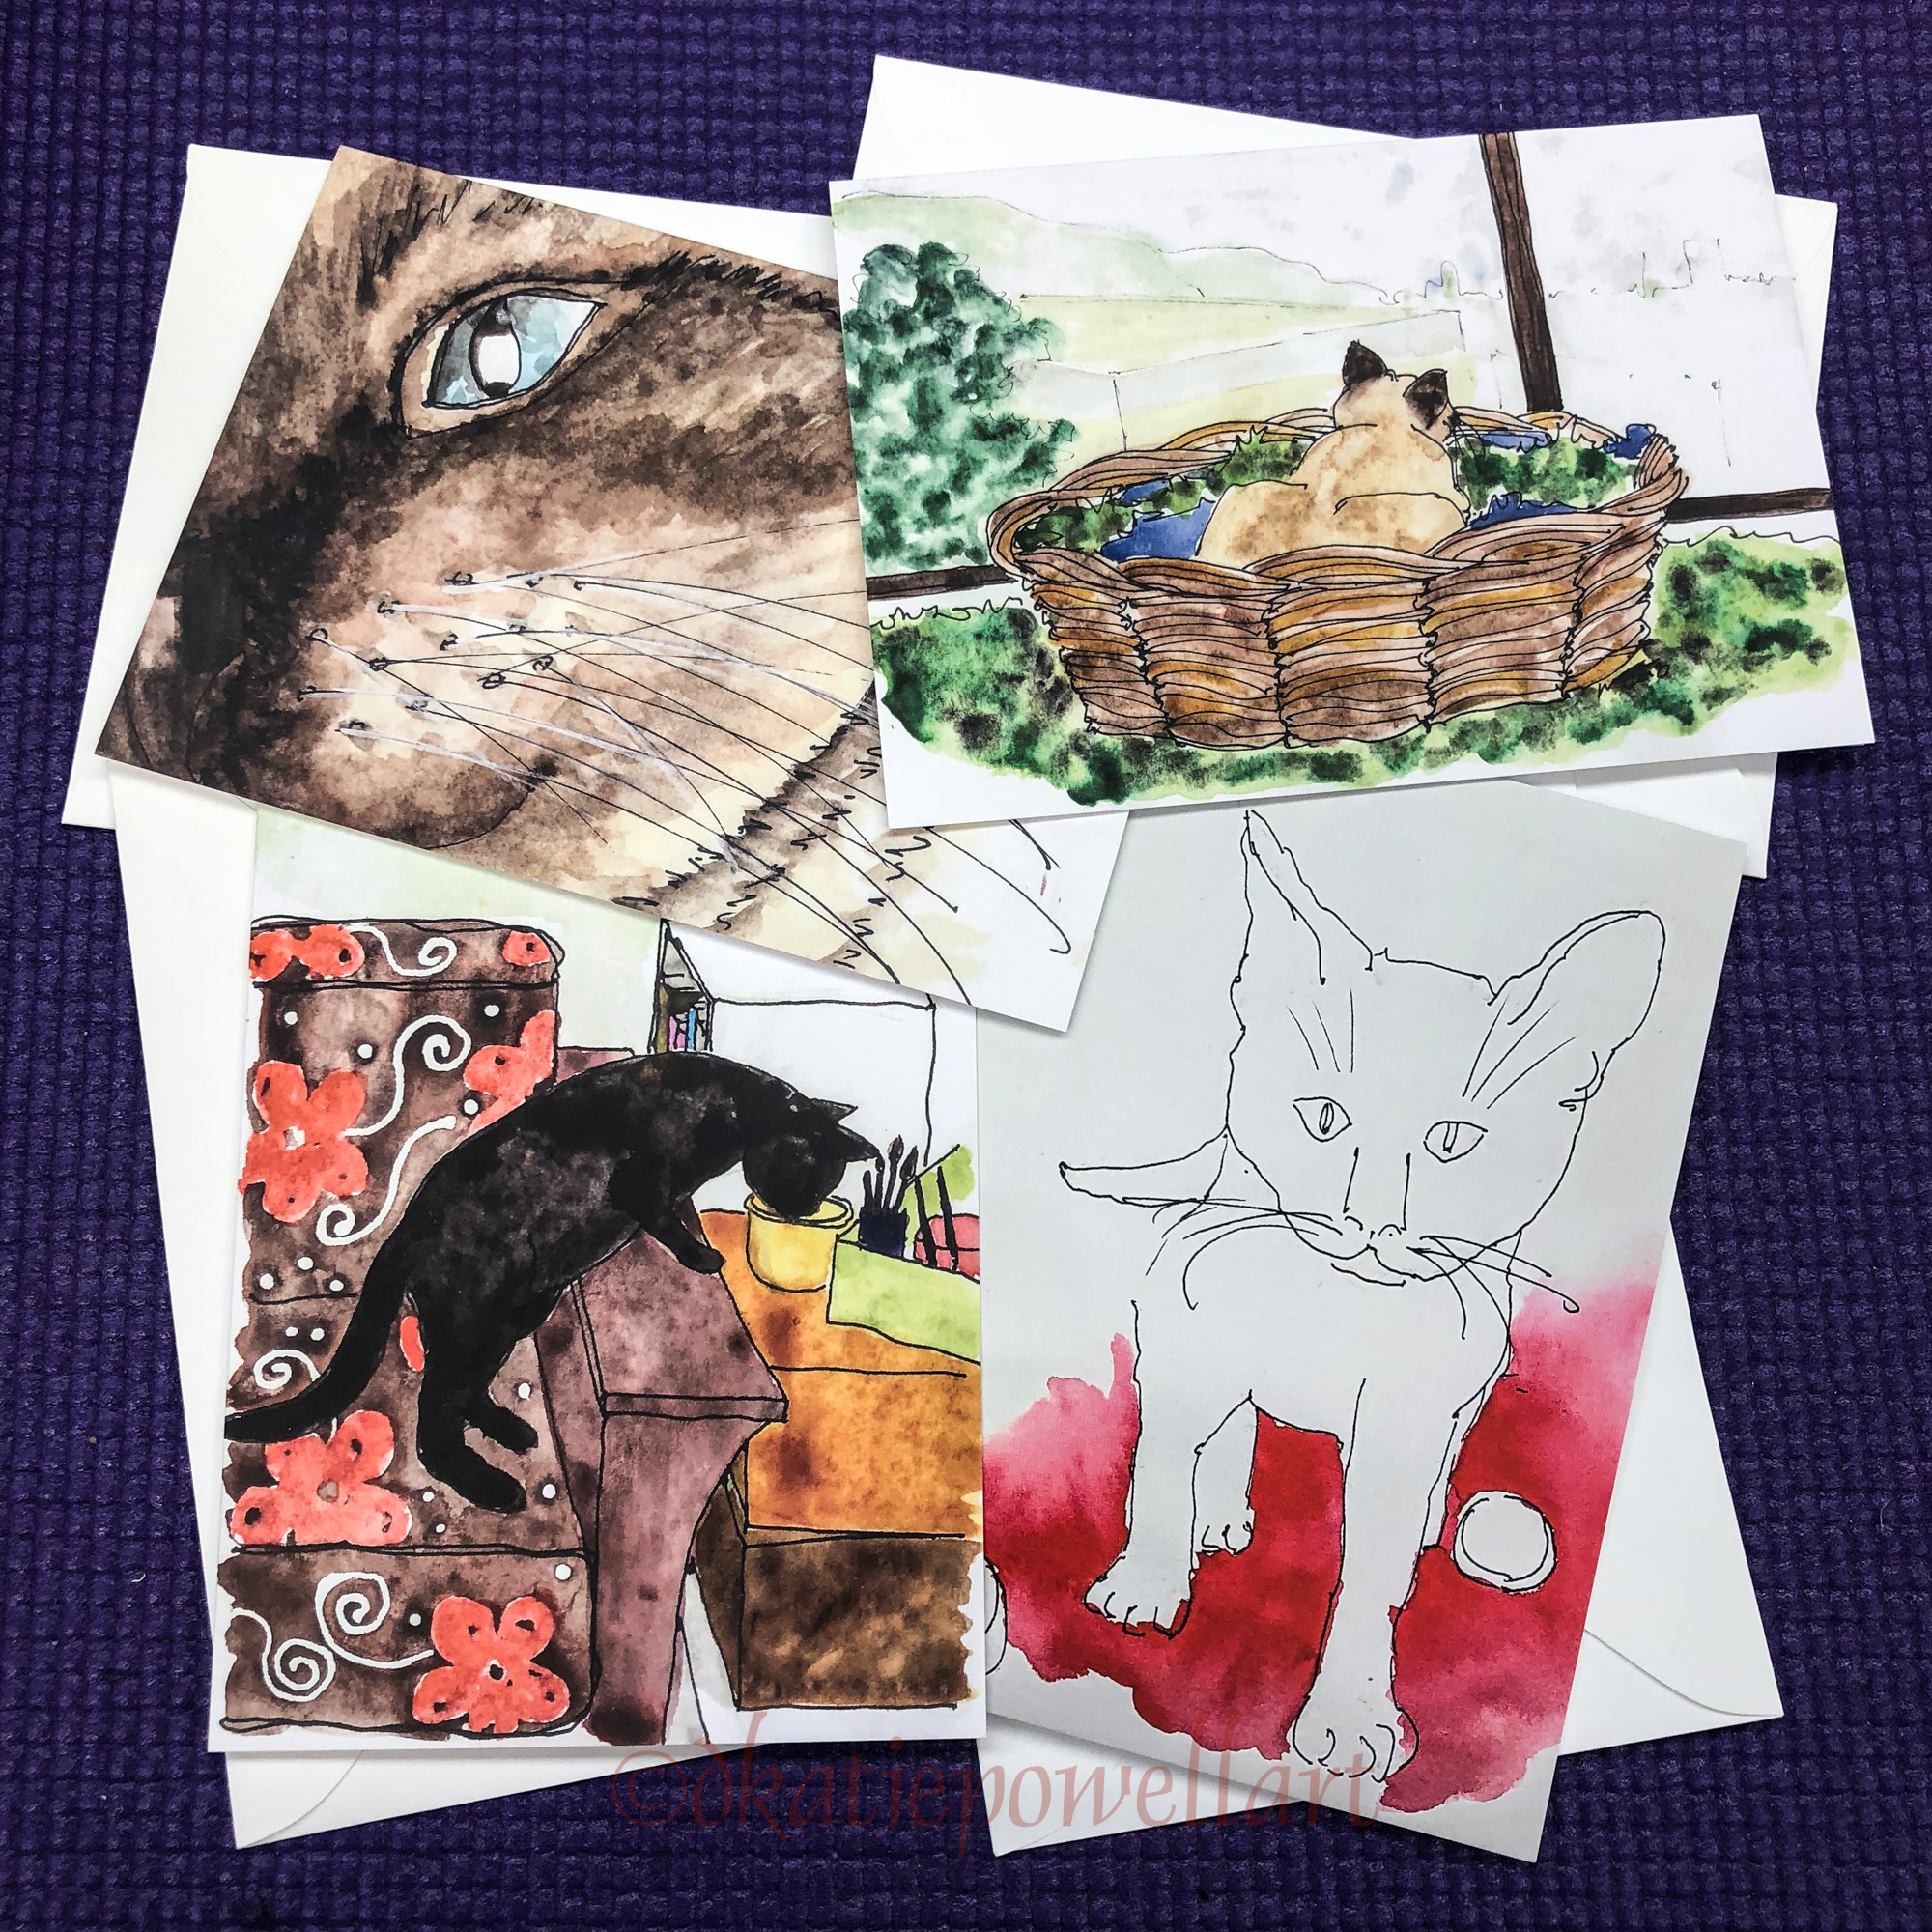
TAZZIE TIPS, 1

I started with a line drawing in waterproof ink like the sample above.
I use fountain pens but any ink you can wash over is fine…
though eventually you will probably want to try a fountain pen.
Less to the landfill, and you can choose the colors!
Where you end up is the colors moving with a waterbrush, below.
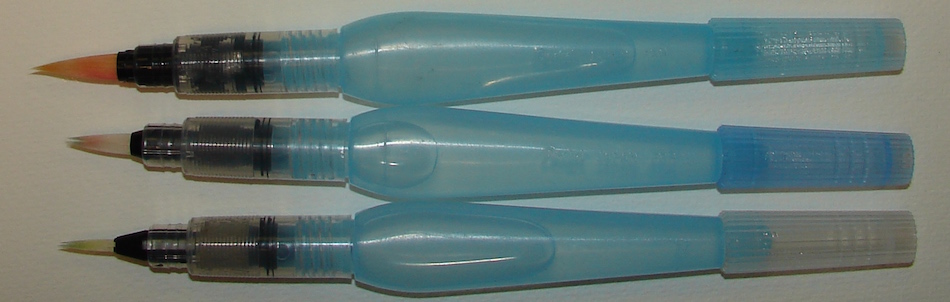
I love Pentel Aquash waterbrushes, and buy them in the packs from Amazon.
They keep their points longer than others I’ve tried,
and the plastic screw mechanism doesn’t disintegrate quickly.
I use them for diluted ink washes, but LOVE that I don’t have to have an
open container of water in bed with me at night!

 I pick my colors and begin drawing line of ink within the areas I want color to wash.
NOTE: I do the sky last!
I touch my waterbrush to the edge of the line, making sure that my brush is also sitting on the side I want to draw down. You want to move fairly quickly; ink dries fast… I pull or draw down, and less ink pigment moves the farther I get (see below) so it is more intense around the linework.
You might want to practice.
Let each color dry unless you are okay with possible blending, shown below.

 If you are very picky and precise about your color work,
(I sometimes want it just so)
do not add all the color at once as I did above, but add each color then draw it out
with the waterbrush,
letting it dry between colors… In my fast sketches I am
okay with happy accidents.
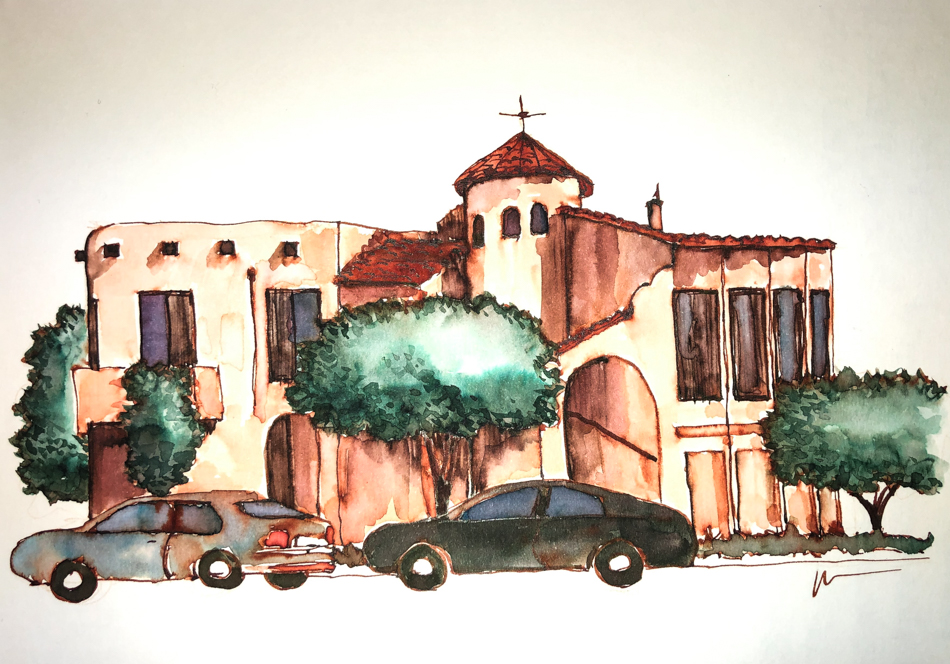
I used a waterbrush filled with diluted waterproof grey on the buildings, but before I went over it with the grey I put in a few rusty soluble inks streaks: See what they did below!
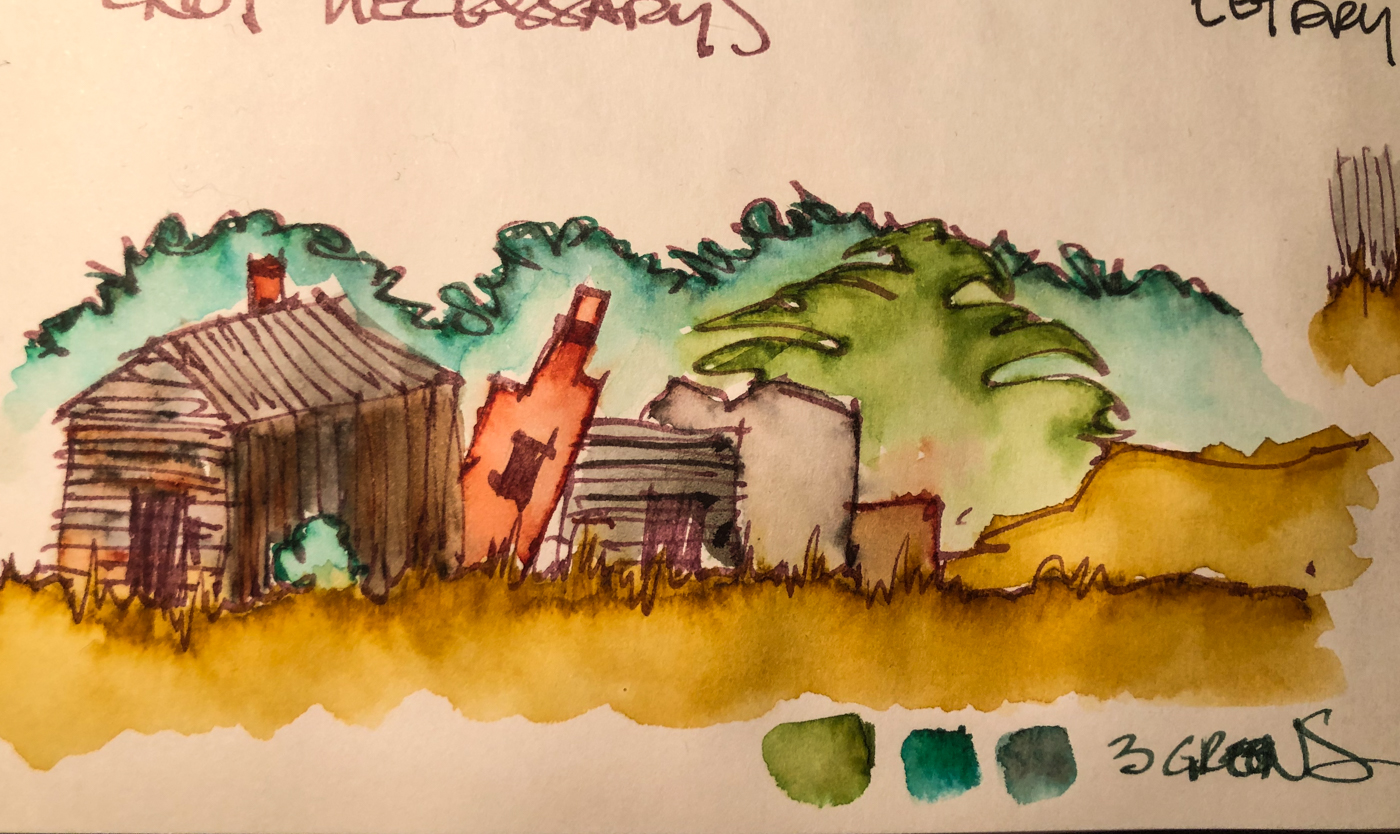
I water-painted the greens together, then the golds/brown/grey building together.
After all that, I came back and lined the tops of the trees with blue and did the sky.
It picks up some of the trees and makes a lovely blended color…

Above I’ve done the same technique,
but I colored the river in waterproof grey with a waterbrush.
Below, this technique was used around the geranium center and drawn out lighter,
but for the rest I wet the background with the water and
dropped a bit of color in by touching my brush to my pen nib.
BTW, inks are harder to tame than watercolors!

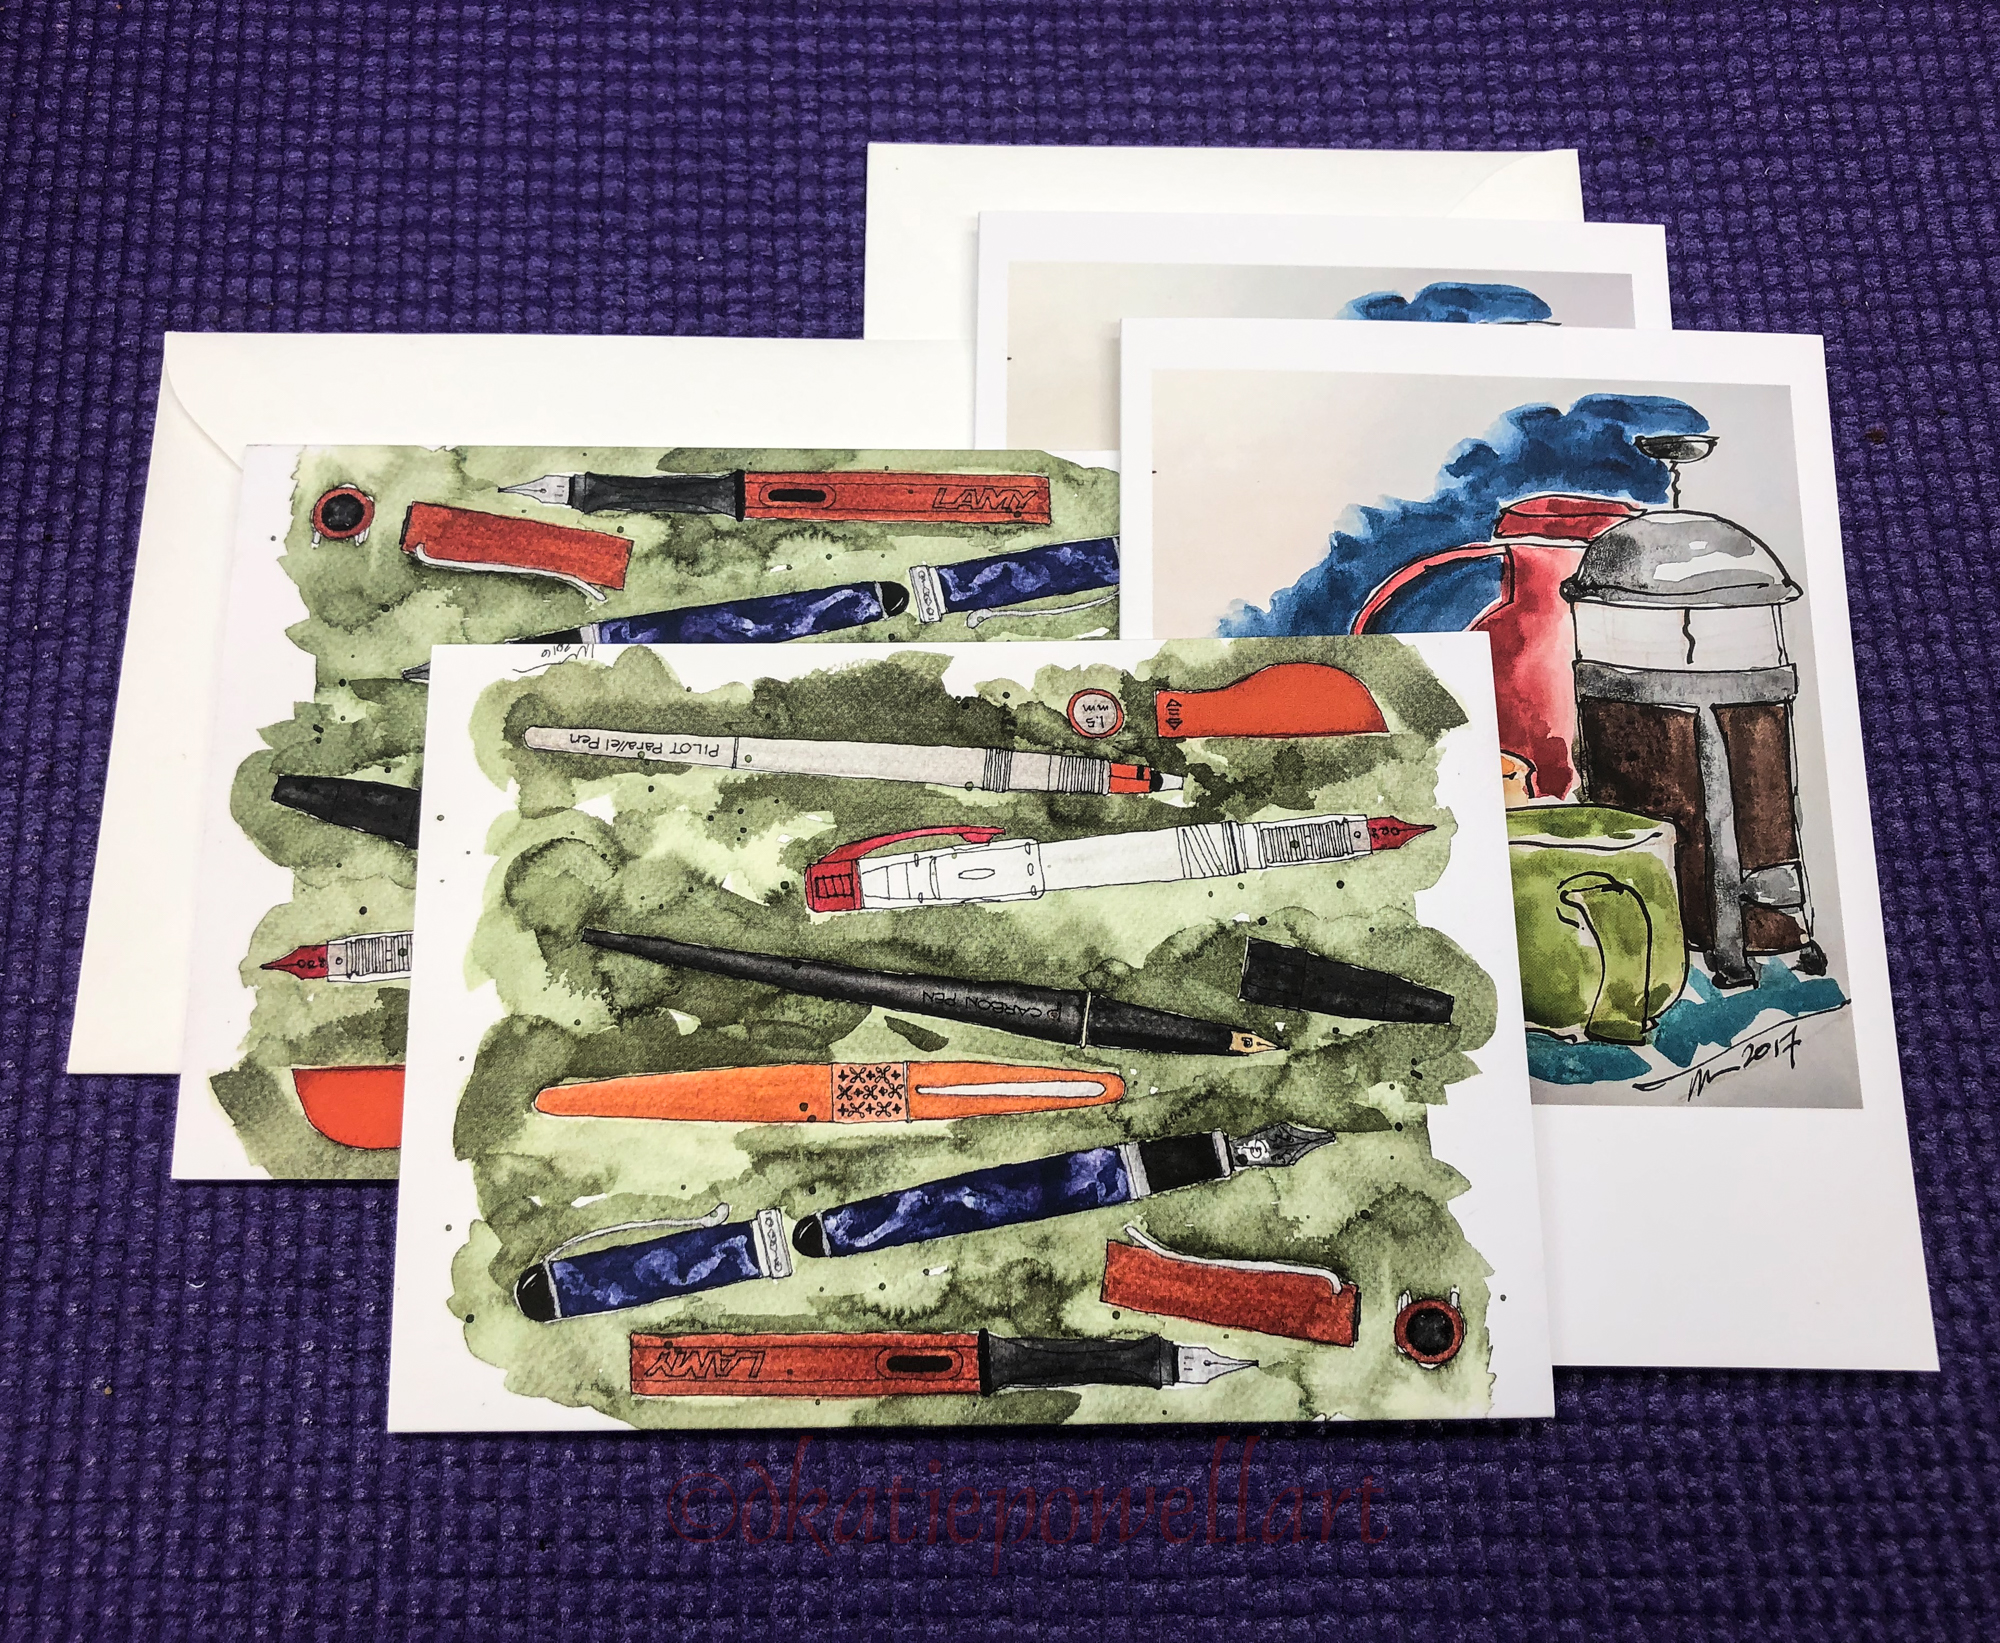
SIMPLE EXERCISE, 2


Above, I simple use a Pentel Aquash waterbrush filled with water,
and touched the Robert Oster Emerald ink on the top or undersides of
my TWSBI Eco 1.1, then ran it along the DRY paper edge (#1) and
then pulled it down without squeezing and it naturally dilutes with water.
Then before it was completely dry, I went back in with much more ink on my brush
and created the reflection of the trees in the lake.
After that was dry, I sketched the trees…
Note that the ink will go through watercolor paper much faster than watercolors,
so I sketched several layers keep it from going through.
Finally, I touched my waterbrush with a bit more ink on the tips
and filled in select areas of the front trees.
This took about 15 minutes without drying times, and would be a good practice.
A very very fast little sketch, used by me to test inks.
GREEN LIME, 3


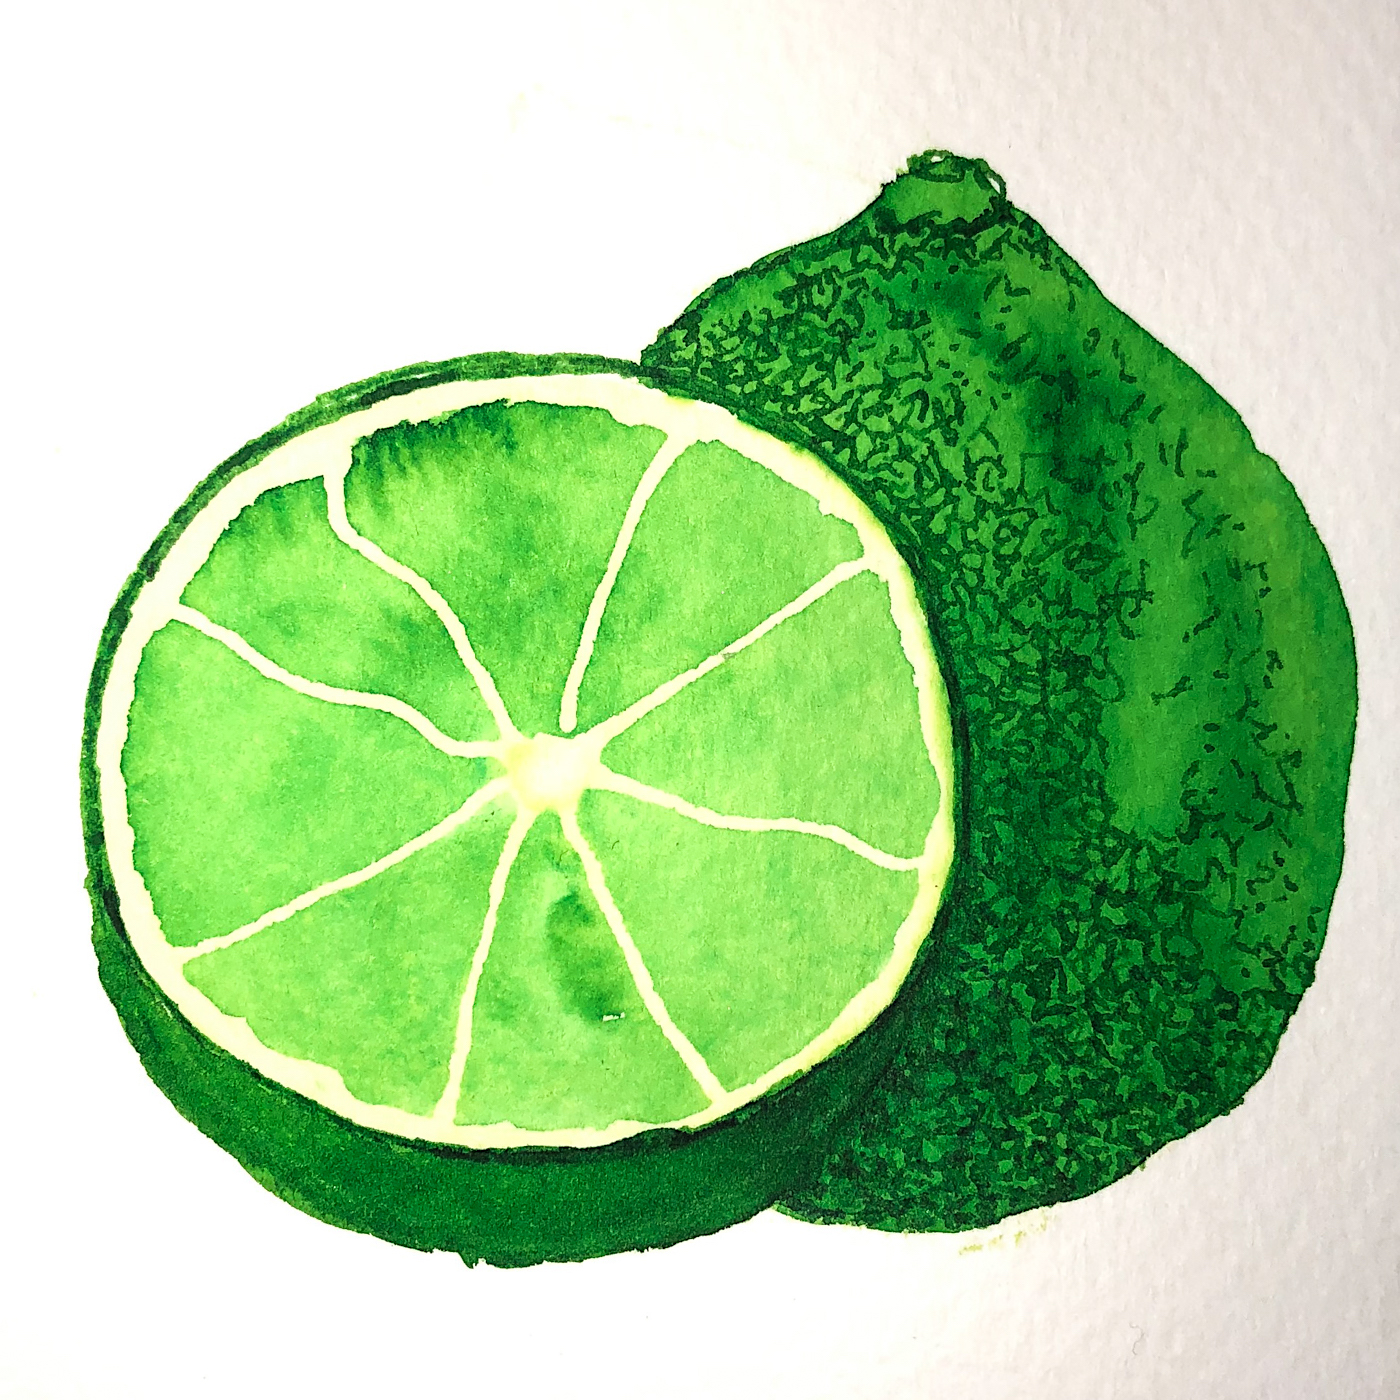
This is a totally different protocol. The paper was wet for the diluted lighter wash.
WET, as in, wet it once then came back and wet it again just before I started.
I touched the Pentel Aquash waterbrush to my Platignum pen to pick up Robert Oster Green Lime ink, and created the lightest value of the green.
I let that dry, then added the darkest “wash” on dry paper (#1).
Just like with watercolors, I play around and get to know the inks I am painting with… Are they waterproof? resistant? fully soluble?
It is important because you want to know what flexibility you have!
In this case, Green Lime ink is extremely soluble… This means that I can fully erase a line, which becomes important a bit later as I changed my sketch.
In #2 I added Fineline Masking Fluid to save the pale areas of the cut lime.
Let it thoroughly dry! I was happy happy when I found out
it works just as well (so far) for inks as it does for watercolors!
#3 shows the third value of the same ink, and now this takes a bit of practice to get just the right amount of ink (very little) on your brush and move it so that you have the right color all around the drawing. Soluble ink works best for this.
After drying I removed the masking fluid…
 I needed to change the
shape of the cut lime
(I’d started with one idea then changed it) and this is where soluble inks rule… #4-#5 I was able to go over the old ink,
add to the line of my
new dark Green Lime ink.
Big tip: If you decide to move inks, go over the entire area instead of touching up, or it will bloom (see deliberate bloom right) instead of blending. Inks are very different than watercolors!
I let that area dry.
I then came back and added line details using my pen in #6.
If you want your ink lines a bit soft let the paper be just damp —
If sharp, then dry. I wanted these sharp.
This sketch took longer, needed planning, needs a bit more practice.
About a half hour not including drying time.

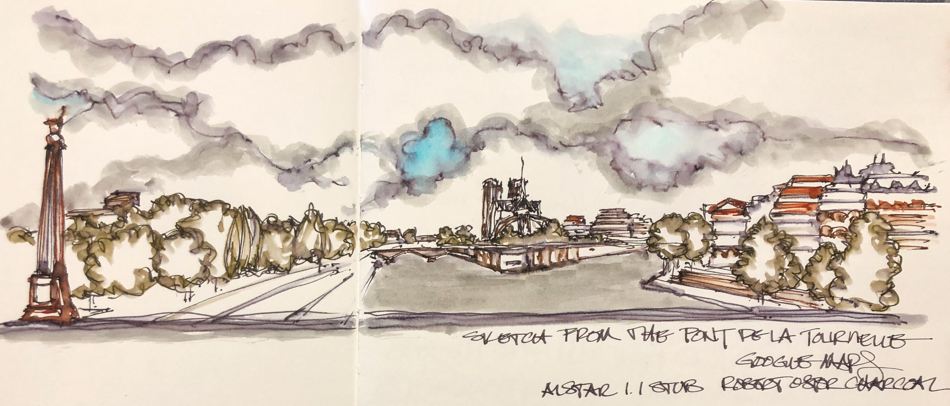
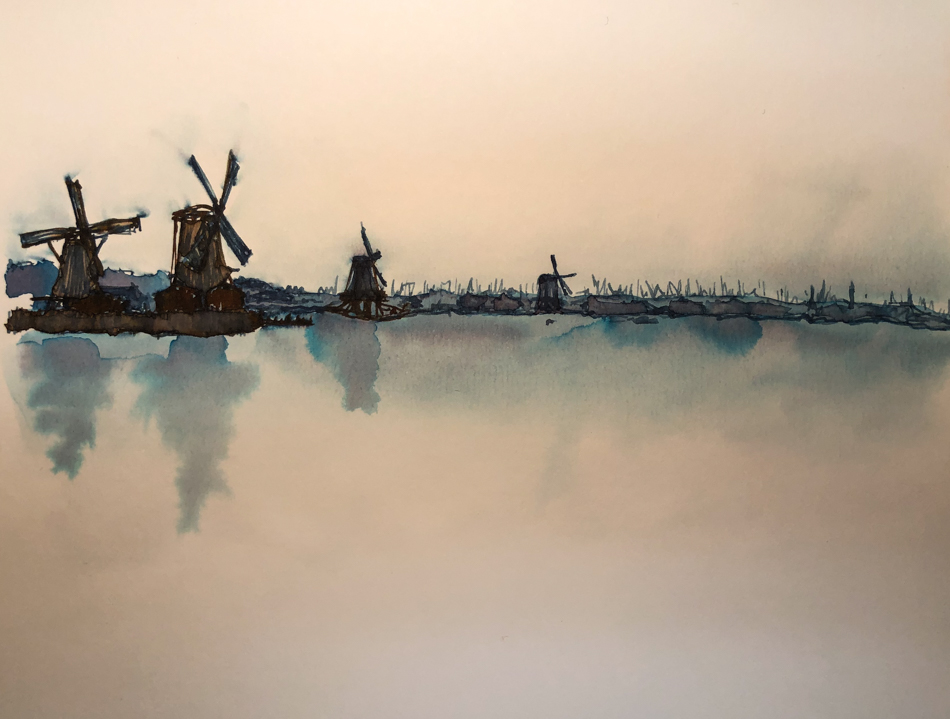 In an inky sketch of
windmills in a foggy morning. I started with a horizon line… then before I got too far in my sketch I pulled ink down for the water, and up for the sky (wet area above shows the distance of the pull.)
I wish I’d done this when I had just my horizon line in place, but it still worked.
The image was a foggy grey day across a body of water.
Over the dried ink wash I moved across the horizon line, adding lines for the various windmills and trees and such. I used two colors, the Robert Oster Midnight Sapphire, and then to warm the banks and wooden structures, Robert Oster Aussie Brown ink.
It is risky laying in two lines of colored inks — I suggest trying it on a test area
so you can see how dark it is getting and how saturated. A little ink goes LONG way.
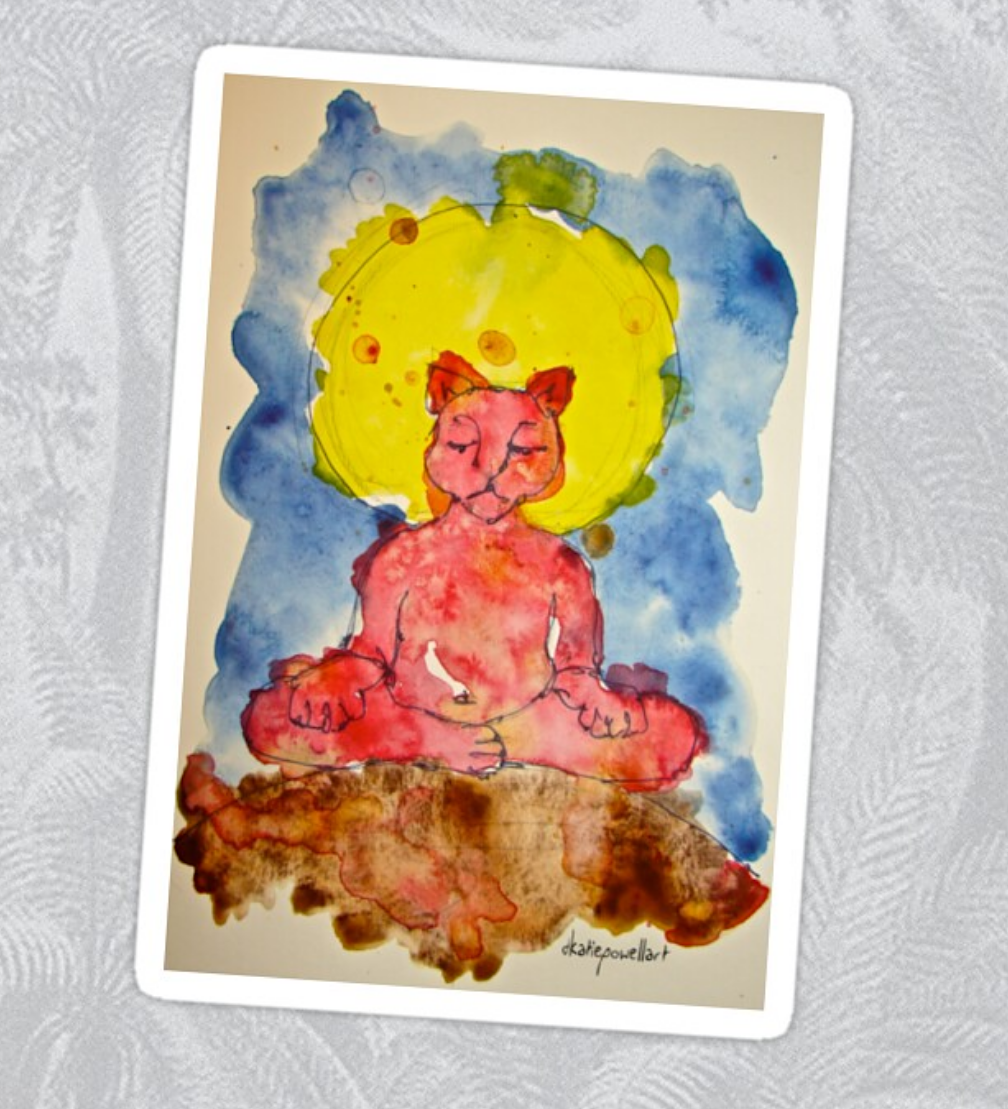
LION, BRUSHWORK
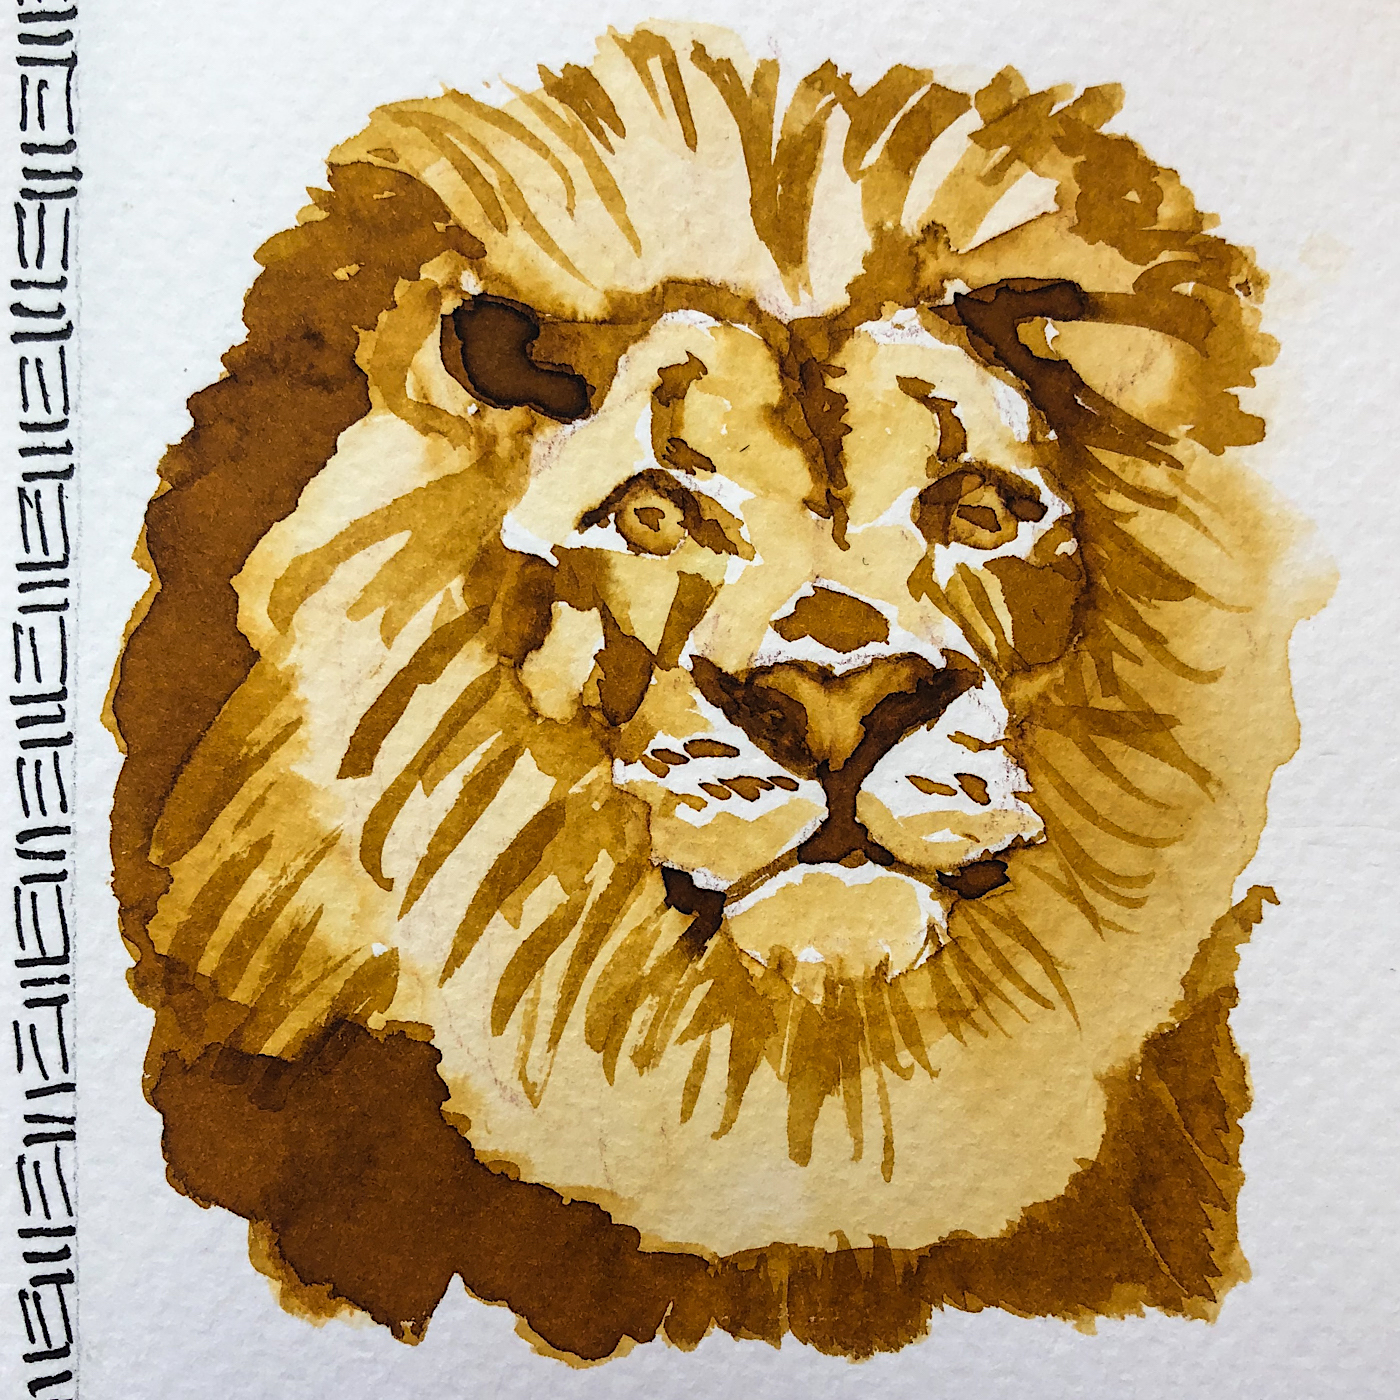
This was a buildup of several layers of inks over a drawing with watercolor pencil.
I started with the lightest on wet paper, let dry, then began adding layers while squeezing the waterbrush. Practice — the amount of squeeze (adding water) and the amount of ink you pick up off the tip of your pen determines the value of the ink.
Lamy Vista with Robert Oster African Gold ink and a Pentel Aquash waterbrush.


©D. Katie Powell.
My images/blog posts may be reposted; please link back to dkatiepowellart.
☾
 As my Patreon supporter, you will have
access to some content not on this website,
sneak previews, goodies, discounts on classes.
I teach architectural sketching,
art journaling (art+writing), creativity, watercolors.
That annoying loud-mouth editor/critic in your head? GONE! How great would that be?