
 In an effort to begin to discuss how I look at buildings in order to begin to draw them,
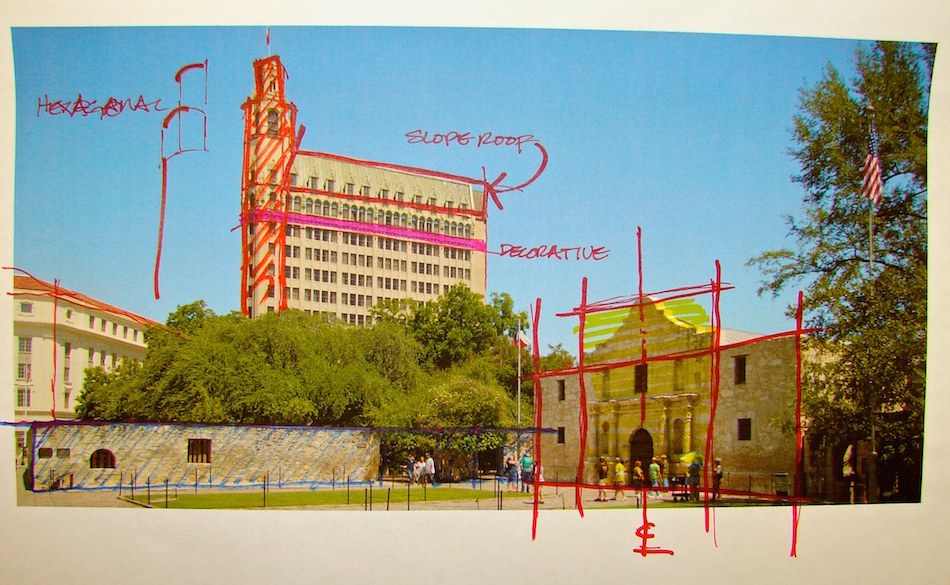
I took an image of the Alamo and dissected it. Most of this I do by simply looking, but what helps is I know what I am looking at. The exercise of doing this on paper by studying photographed buildings is a good one, and occasionally if I am drawing a building I’ve never seen which is extremely complicated I will also do this because I see best when I am drawing or taking notes. (For that matter, I hear lectures best when I am drawing….)
I studied the whole image, but am discussing two parts.

 Take the face of the Alamo in this picture. The building is divided into three parts:
a center area with columns and niches — and what appears to be the entrance —
and a mission style Italianate roofline,
and two flanking areas that appear at
first glance to be symmetrical. Further,
the building appears to be two stories
with a decorative third element on top.
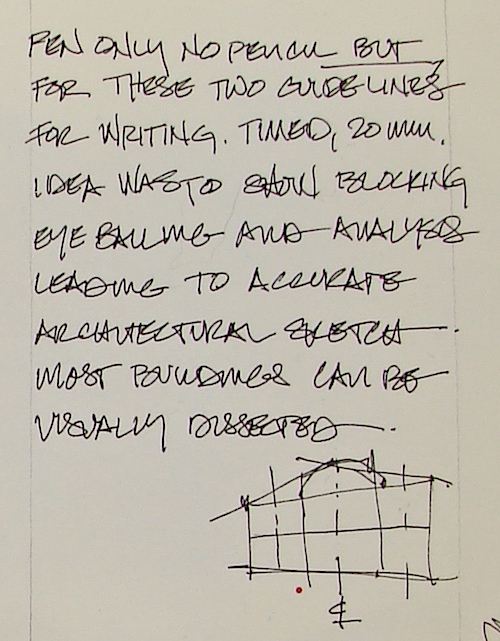
If I were going to draw this information,
it might look like the diagram right. The notation that looks like a C intersecting an L means center-line, and center-lines can be for the whole building or for a door or window motif. Here it indicates that it is roughly symmetrical from that center line.
By drawing over the photo you can also get a feel for the perspective.
Notice how much smaller the windows on the left are, and how the edges of
the windows align with the top and bottom overall perspective lines.
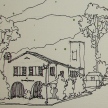
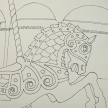
 From there I can begin to draw in the shapes of windows and doors and details.
Darken actual open window or holes. Rough in the shapes of the columns
and what appears to be either niches or filled in windows.
A fast study sketch can be a nice looking sketch once you get the hang of it — and yet you see I’ve not drawn the spiraling detail of the columns or the carved decorative tops.
Obviously in the field you can’t do this.
And of course you can take a couple years and learn to create technical drawings.
Or you can take a couple of photos and begin to analyze or dissect the buildings
you see like this, and by doing that begin to get a feel for or a
visual understanding of the building in front of you.
 And then watercolor makes it all seem like I know what I am doing!
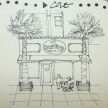
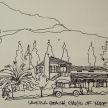
 So let’s look at another.
This is a complicated building with a strange roofline — a mansard roof,
but more than that, it connects strangely to the front of the flatiron building.
Is it circular or… nope, it is hexagonal. The windows, which architects call fenestration, change shape as they move up the main part of the building. Why did they so this?
The pattern suggests to me that the floors which match and march along are probably fairly common in their similarities (offices? hotel rooms?),
while the arched windows toward the top suggest formal rooms of some sort —
ballrooms, fancy suites — all this without me knowing anything about this building.
There is a band of decorative molding below those windows (colored pink.)
Finally, there is yet another change in the windows of the mansard roof. Apartments? Whether you know the story or not you can begin to read the patterns.
At the top of the hexagonal corner there is a lookout of some sort.
And while you wouldn’t know it, I can bet there is a fire escape at the right
where there are no windows. Perhaps even an addition, perhaps not.

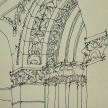
 If you look closely at the sketch
right and above you can see that
I also looked at the three parts
of the tall building:
the hexagonal left piece,
and the top of the right versus
the bottom, which is repetitive.
I imagine that the tall piece on the left
is full of gathering places and viewing places, public rooms, reception.
Notice how loose the indication of my decorative molding is?
Because my focus is not to spend time on the tall building, I also loosely
blocked in ganged windows in the body of the high-rise.
 Further, when I added watercolor I wanted to draw the eye down to the Alamo, not really up to the building behind… and so, I did not color the building except for the flag.
These are the types of tips and lessons my videos will cover!
Moleskin 8×11 watercolor journal,
Lamy Al-Star with De Atramentis Document Black ink,
Platinum Carbon Pen with Platinum Carbon ink waterproof cartridges,
Sennelier, Holbein, and DS Primatek watercolors, and Daniel Smith Watercolors.
I started a Facebook group page (you must join to view) to allow everyone to share their virtual sketches, and also where we will, from time to time, take virtual sketch walks together. Come join us On Facebook if you are inclined!
©D. Katie Powell.
My images/blog posts may be reposted; please link back to dkatiepowellart.
☾
 As my Patreon supporter, you will have
access to some content not on this website,
sneak previews, goodies, discounts on classes.
I teach architectural sketching,
art journaling (art+writing), creativity, watercolors.
That annoying loud-mouth editor/critic in your head? GONE! How great would that be?


I enjoy reading about your thought process.
LikeLike
Thanks Dan. I think one day you’ll happen into an art store and the tools and paper will follow you hone and you’ll just pick them up and wa-lah!
LikeLiked by 1 person
I have always been fascinated with art tools. Just like woodworking, it’s hard to walk through and not start buying.
LikeLike
Art stores and hardware stores….
LikeLiked by 1 person
Such an informative post. I am tentative sketcher at best and this was very informative.
LikeLike
I am glad Susan!
LikeLike
Thanks for sharing your process. Love reading about how others think and work.
LikeLike
I do too.
I love all the layers on your face this week. I tried to post that onto your blog page but it won’t take me by my email address.
LikeLike
Wow! This is nice. You make it look easy, but I know it’s not. 🙂
LikeLike
It can become “easy” if done enough… I promise!
LikeLike
Awesome! Thanks for sharing your thought process and breaking it down. I’m going to employ this technique!
LikeLike
Can’t wait to see!
LikeLiked by 1 person
Pingback: Random thoughts about architectural school | D.Katie Powell Art